Storage Basket Ideas

S T O R A G E   B A S K E T S    F O R   A N Y   S P A C E   I N   Y O U R   H O M E

R O O M    I D E A S 


S N I D A D

S N I D A D

 
I N D R E S S

I N D R E S S

 
G U A L Ö V

G U A L Ö V


F L Å D I S

F L Å D I S

 
P L U M S A

P L U M S A

 
D I I

D I I


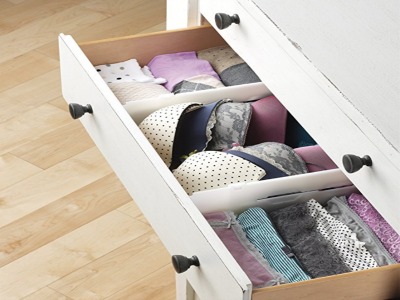
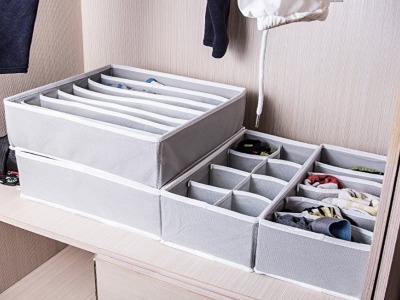
With the ever so changing way we store our home goods, one of the best ways to organize and display your throw blankets is in storage baskets like the ones above.

Not only can you find various options, they are inexpensive (for the most part) and can fit in multiple home styles. If you’re interested in learning about the above storage baskets and how you can use them, keep reading.


S N I D A D

This basket is a personal favorite of mine because of its straw like appearance and openness. Because it’s so open, it’s perfect for items you want to display, like throw blankets and pillows. Of course, you can add anything in the basket but if your goal is to create an organized and visually appealing space, the best items for this basket is anything that is nice to look at.

I N D R E S S

Unlike the Snidad basket, this basket is very space specific. The reason why I say this is because it is colored, though neutral and it fits well in a more monochromatic space. Since this basket is closed, you’re really able to put anything in it. Other than putting your blankets and pillows, you can put remotes, books or anything you like to use in your living space.

G U A L Ö V

Because of the lid, this basket is multifunctional. Other than having additional storage, it also comes with a top which allows you to not only store things in it, you can place items on it.

F L Å D I S

Not only is this basket spacious, in the case you choose switch to another basket, it folds flat and can be put away easily. If you do end up using it, it’s great for really anything that can fit in it. The most popular use for this basket is to place indoor plants in it. Plants like parlor palms, fiddle leaf figs or even white bird of paradise fits perfectly in this basket.

P L U M S A

Perfect for a nursery or a playroom, this basket maintains its spot as the most versatile amongst the others. Not only is it gender neutral, it is made out of cloth making it easy to wash when needed. The leather handles make it easy to carry plus it has a hook-friendly hanging function.

D I I

This is another collapsible bin that can be easily stored away when not in use. It is a perfect addition to a nursery, home office, craft room, living room and many other spaces that require storage. The black canvas makes stains invisible to the eye and can mesh well with multiple home styles.


So here it is! These are the baskets that have been on my radar and I believe can work in any space. I come across so many storage options for items in our homes and believe storage baskets help keep our space organized and look put together.

I would love to know from you guys what type of basket(s) you use in your home and how you use them.

In the meantime, if you’re interested in learning about what basket will fit your home style, feel free to leave a comment below.

Until next time!


4 Simple ways to Minimize Mail Clutter

Mail Clutter Blog Image.jpg

Hello - I'm back! I know I've been gone for a while but I'm here and ready to help you get more organized.

One of the questions I get most often is “How should I organize my mail?” Though there are many ways to do so and honestly it really depends on your habits but if you’re interested in learning how to decrease the clutter before it takes over your kitchen counter, I have some simple tips that can help you with that.

Ready. Set. Rescueeeeeee! 

The first tip to minimizing mail clutter is to:

discard spam mail before you enter your home

 When you check the mail before you step one foot into your home, throw away/recycle the mail that you don’t want. If you not comfortable with throwing mail out without shredding it, try placing the shredder outside to avoid you from going into your home.

dedicate 5-10 minutes to sort through your mail as soon as it coming into your home

For the other mail that may require more attention, only devote 5-10 minutes to go through them. Because for the most part we already know what mail we are expecting, it shouldn’t take more than 10 minutes to sort through. If you receive a letter that requires more attention, focus on that particular one last and try to resolve the issue if any, there and then. For example, if you received a wedding invitation that required you to fill out an RSVP, its best to fill it out at that moment than waiting to the very last minute because you forgot. Try not to put it off because the last thing you want to do is forget an important date.

opt-out spam mail

If you’re tired of receiving spam letters like magazines, credit card applications, coupons and etc., there are a few websites out there that work to help you remove your information from these lists. Funny enough some of the companies will be happy to remove your information since doing so will help them save money from printing. Below is a great link that has a list of website that will help you opt out.

Go here: www.ecocycle.org/junkmail

automate your mail (Go Paperless)

 My favorite and probably the easiest way to minimize your mail is to go paperless. Thankfully a lot of places like banks, department stores even healthcare providers offer this option. I believe going paperless is a much safer and secure way to stay organized. You get an email when your digital statements and documents are available and you can access your account statements and documents at your convenience online or nowadays via an app. Just simple!

At the end of the day, its all about your habits. If you are willing to get up for work, eat lunch, dress your bed, get dressed or even bite your nails, you too can get a handle of your mail. Start small. Try 1-2 of the tips mentioned and see how it works for you. If they don’t, try another one or two. It’s all about figuring out what works best for your current lifestyle and repeating it over and over until it becomes second nature.

Try it and let me know how it goes. Until next time!

signature for blog post .png


Let It GO!

rendered.jpg

This concept sort of seems obvious since letting go of anything really only requires a trash bin and a thought. Like, you take an item and throw it away therefore it will never be seen again, right?

If only it were that simple.

With landfills constantly growing where 4000 – 5000 tons of trash is being processed per day six days a week especially here in the Houston alone, the idea of individuals having difficulties letting go of possessions may seem a bit hard to believe.

But believe it. With the amount of pressure we have to get the latest items or to have the next best thing, it's no reason why the average American household owns about 300,000 items.

I'll be first to say "We have a Problem" and "We need HELP."

I personally believe there are major stages in our lives when we should let go of stuff. Because we’re constantly evolving and looking for different ways to re-invent ourselves, what better way to do so than to let go of all things that no longer bring positivity, make us upset or no longer serve us. If you’re wondering, “what the heck does things serving us mean?” Well since you asked, it’s when something hasn’t been used for long time (over 2 years), it doesn’t make your life better, it conjures negative thoughts, or is just plain fugly and clashes with your home décor.

So here are 3 Stages in our lives when we should start thinking of letting things go.

L O S S

I have always been skeptical when dealing with this subject because of the multiple emotional stages death brings. There is no true way to say how someone should cope with loss yet alone move on but one thing I know is the belongings that are left behind typically never get used. A lot of times, it gets put in a room or thrown in storage and left alone for years. Unless, the items are valuable and have been appraised for a dollar amount you’re willing to accept, or there’s a family member who has a use for it, it may be time to let it go. Of course, I do believe it’s okay to hold onto some items especially if they ignite emotion and you're not ready to let go. For those items I’d suggest putting them in 1 clear container (Yes I said 1) and storing it away. Whenever you’re ready to let them go, you will know.

A  B R E A K U P

I’ve been through several break ups in my lifetime and this has been something I’ve followed for many years and each time I did, it worked. After a breakup, regardless of what it is, get rid of everything your ex gave you. Whether that’s a ring, a pen or even a house. It’s important that you remove yourself from these past possessions because once the relationship is over, you’ll need to detox your life from all things that remind you of that person or of the old you, so you can move and experience what's new to come. 

L O S I N G  W E I G H T

When you're losing weight you’re not only getting rid of pounds, you’re also getting rid of all the negativity that came with those pounds. During this phase in your life, you’ll be discovering a new you and with that comes new possibilities, new adventures and let’s be honest, new stuff. That means, those old clothes that no longer fit, let it go. This also includes old habits, old thoughts and old behaviors.

So instead of viewing your weight loss on a linear aspect, try viewing it as an onion with many peels. Before you get to the core which is the actual shedding of the pounds, look at the various characteristics in your life that may need some reviewing. I'm more than positive you will need to let go of something on the way. 


Though it may appear when you let something go it requires a lot of physical manipulation but in all honestly it's more than that. Letting go requires loads of mental activity which may be difficult to confront at once but over time it will get easier especially for those more sentimental stuff. 

If you have items in your home that are difficult to let go, let me know in the comments section below so we can discuss how to let them go. 

Thank you for your time and I hope this pushes you to begin your organizing journey. 

Until next time! 

signature+for+blog+post+.png


3 Simple Tips to tackle a Cluttered Space

Cluttered Space Blog Post TN.jpg

So you walk into your room and you can’t find your favorite top. You’re walking through stuff, you’re stepping on stuff and you’re falling on stuff. You’ve now spent way too long looking for it and now you’re late to your first date.  

Your room is cluttered and you need help!

1.     S T A R T   S M A L L

Allocate 2-3 hours or the amount of time you’re willing to dedicate to organizing every week until your space is completely organized.

It’s important to keep in mind that the 9 months of clutter didn’t get that way in a couple of hours. So, the longer it took your space to get where it is, the longer it may take you to get through it.

So, in those hours, you will begin organizing one area at a time. If you want to start with your drawers, start there first and only work on that drawer until you completely organize it before you go to another area. Try not to jump from one place to another because this is what causes us not to finish.

But once that alarm goes off and your time is up, you’re done for the day and you can focus on another task. This will prevent you from the overwhelm you may get from taking on the entire space at one time.


2.     S O R T   Y O U R   I T E M S

Rather than sorting your items into a “KEEP”, “DONATE” or “TRASH” pile, group like items together and then sort through each individual pile and only decide on what you want to keep.

For example, let's say you want to organize your pens. You’ll need to gather all of the pens you have in your space. This means you need to go through your entire home or office and gather all of your pens and place them in 1 pile. Next, go through the pile and only choose the pens you love. During this step, you’ll be able to determine which pens no longer work, make your hands ache or are just right out ugly. If you don’t know already this is the pile you will be getting rid of for good.

The awesome part about this process is it removes the pressure from decision making and allows you to choose the items you truly love.

 Try it and let me know if it works.


3.     P R A C T I C E    L E T T I N G   G O

Because practice makes perfect, before you take on any organizing project, you should practice letting go. You should First let go of the items that are the easiest to get rid of. For example, start by letting go of a dirty towel, old ripped clothes or expired food. Because these items typically don’t require much thought and lack emotional attachment you’re likely to let them go the easiest.

So go around your home and practice letting go of less meaningful things.

·      That old balled up receipt… Let it go!

·      That old and worn boyfriend shirt…. Let it go!

·      That expired candy bar… Let it go!

·      That picture of you and your ex-best friend who stole money from you… LET THAT SH%@ GO!

·      Those old batteries that no longer have life… let's say it together… Let it go!

 As you practice letting go, you will find it much easier to let go of those more meaningful possessions that you’ve accumulated over the years. Once you start letting them go you will begin to notice your space staying organized and most importantly your life improving.

Until next time! 

signature for blog post .png
 

The Power of Clarity

bloom-blossom-flora-982385.jpg

For the last couple of weeks, my life has been hectic. If you don’t know, I do have a corporate job where I go to work Monday – Friday and honestly, it takes a lot of my energy. One of the reasons why my videos now go up every so often and let’s not talk about blog posts or the lack thereof is that I’ve been feeling overwhelmed and drained.  I have so many ideas I want to bring to the world but the moment I get home, I’m physically done for the day. 

So, the reason I’m bringing this up is because my home has been suffering a bit. My space is in shambles both physically and mentally. My laundry is overflowing and each room in my home is out of whack. My life feels like its falling apart and a lot of times I want to give up. Give up on what I want to accomplish that is. My first instinct is I should quit my day job and focus on growing my business but then reality sets in and I don’t. I can’t. I need the money. It’s like I’m tied to my job and each time I try to run away; the rope pulls me back.

With all this said, if you are experiencing something similar or need a change in your life, don't give up. Please don't. There have been so many instances where giving up would mean having an easier life, spending more time with my friends and family but because of my goal, which sometimes feels bigger than myself, is much more important, I'm still here.

So I made a change, a necessary one at that. 

Last week I scheduled in 2 hours to organize my space and man do I feel great. I started small in one area of my home and slowly moved on to bigger portions. I didn't do it all at once, rather I took baby steps. I now feel lighter and my mind feels clearer. Though I still have some more to go, it's not as daunting. You see, organizing your space is not about how fast you do it or how tidy it looks, it's about creating a space that makes you feel good. A space that speaks to your soul. A space that's forgivable when you slip up but is always ready for change. 

I know I preach this constantly and still stand by it but sometimes you don't always practice when you preach especially when you're experiencing setbacks in your life and that's okay. It's all about re-balancing to put you back on track. I believe it's because of these "pitfalls" why we supersede our goals.

If you're going through anything similar, let me know below and let's start a conversation. 

As always, talk to you soon! 

signature for blog post.png


3 Simple ways to Organize your Bras!

They are soft, hard, sore, sag, have various sizes, can change the way the world views us and most importantly provide nourishment.

Can you guess what I'm talking about?

Boobies, breast, tits, knockers, bazookas the list can go on and on are an important part of being a woman. Because we are born with boobs, to slow down the process of sagging and for some of us to help with posture, we have to wear bras.

Fun Fact: When I was 18 years old, I wanted a boob job. For whatever reason I was extremely self-conscious of my breast and wanted them BIGGER. After leaving the consultation, I realized that doing this procedure wasn’t for me at least not yet and didn’t proceed with the procedure.  

For the last 5 years I have gone through numerous of bras. Whether they were from Victoria’s Secret or Target, in the past I’ve found it difficult to preserve my bras. At first, I thought it was because I was washing them the wrong way and I thought it was because they were cheap. After years and years, I finally figured it out that the main culprit was the way I stored my bra. Of course, for your bras to last longer, the way you wash it and the quality of it influences the longevity of your bra but for a long time, I was storing incorrectly.

Time has past now, and I have found a few different ways to organize my bras and it has made such a difference in their endurance.

Today I will show you 4 different ways to organize your bras and I hope you try them and let me if they work for you.

Let’s begin with some ways to get your Bra organization ready!

Tips to Prepare your Bras before Organizing them: 

·       Create some space solely for your bras

·       Color coordinate

·       Line them up

Now, here are ways to organize your Bras:

D R A W E R   D I V I D E R S

drawer divider.jpg

Using drawer dividers provides separation in the drawer allowing your bras to breathe and not be bothered. I used these white drawer dividers and they work great in these drawers. If you decide to go this route, make sure you have the correct measurements of your drawer because the dividers come in various sizes and you want to make sure it will fit your drawer. Using this technique, my bras have their own space and have room for growth.

F O L D A B L E   U N D E R W E A R   O R G A N I Z E R

underwear organizer.jpg

 In the first option you line your bras together while the divider keeps them in place. The only difference is your bras sit inside the organizer and are separates bra by bra. This particular organizer has 7 dividers therefore if you have more than 7 bras you will need more organizers. Just keep in mind your bra size is a C cup and higher, it may be difficult to fit the organizer with your bra inside of them in your drawer (unless you have a deep drawer). In this case, you can store your organizer on any flat surface even under the bed if you lack storage.

B O O B I E   T R A P

boobie trap.jpg

  First off let's give an applause to the name of this organizer!

[applause]

The name in its self-explains exactly what it does. It traps your bras in place so they won’t move as you open and close your drawer. They are made to specifically preserve the shape of your bra so you’ll never have to worry about them losing its structure. They do fit in most drawers but just be sure again to measure your drawer before buying them because unlike the foldable underwear organizer, this item is not flexible. They are the most expensive out of the 3 mentioned today so if you but they will keep your bras neatly stored upright in the drawer and keep them nice, neat looking beautiful and organized.

I am giving an away one of these bad boy boobie traps so if you’re interested in getting your hands on one of these let me know if the comments below how many siblings you have and where you fit amongst your siblings.

For example, I have 2 other siblings and I am the middle child!

I hope you enjoyed this article and I hope it helps you get your bras more organized.

Until next time!

signature for blog post .png
 

3 Simple ways to Organize your Shoes

Hello Spacers…. Is it sticking yet??? When I was in my early 20’s shoes were my thang. Not thing but thaaaang! I loved everything shoes and if it was on sale, I was buying multiple. There was a time in my life when I owned over 150 pair of shoes at one time. It got so bad I had to house a lot of them in other rooms and honestly at that time I still thought I needed more. Like I said before, it was my thaaang! Anyways after years of evolving and finding love in more meaning things like creating and travel, that love shortly drizzled.

Jumping forward to now, I still love shoes, but I am very selective in the ones I choose. I stick to the 2 out 1 in rule where when 1 pair comes in 2 goes out and I’m so happy with the amount I have now.

As my collection decreased, my love for finding ways to simplify the way they are stored and organized has increased and I’ve found 3 shoe organizers that I use and love to recommend to others.

Below are 3 of my favorite shoe organizers that have transformed the way my shoes are organized. Each image will be clickable if you’re interested in getting them for yourself. I hope this inspires you to get your shoes organized and to live a more organized life. 😊


Shoe Organizer #1: Hanging Shoe Shelves

This organizer neatly stores and organizes 30 pairs of shoes easily. It’s perfect for organizing closets, laundry, playroom and many other spaces in the home. Because this organizer does take up quite a bit of space, it’s ideal for closets or areas that are medium to large size or have extra space. Assembly is quick and once it’s set up in your space, you’ll have no problem keeping your space organized. Gone are the days when your shoes are forced to sit on the floor. Now they can hang in peace and stay organized.

hanging shelves.jpg

Shoe Organizer #2: Under bed Shoe Organizer

If you are lacking storage space, this organizer will help keep your space organized and best of all hidden. Because it has many shelves, you are able to fit a good number of pairs of shoes comfortably. It’s even great for heels! Assembly is quick and simple and most importantly can be stored not just under a number of furniture items. If you’re looking for a simpler and inexpensive method of combating your shoes, this organizer does the job perfectly.

under bed organizer .jpg

Shoe Organizer #3: Shoe Stackers

This shoe organizer is a bit different because rather than storing your shoes in the organizer, you will store your shoes under and on the organizer. The organizer creates more space in tight areas so if you need to add more shoes on a shoe rack or in a shoe cabinet you can easily. Once your stacker is out of the package it’s ready to use which is essential when simplicity is your goal. This particular shoe stacker organizer only comes with 6 stackers but if you have more than 6 pairs of shoes, you will definitely need more. Besides that, this is a great organizer to incorporate into your space if you’re looking to store your shoes in a more efficient and cost efficient way.

shoe stackers.jpg

If you're interested in learning more about different organizing products that are simple to incorporate, assemble and can transform the way your home functions, let me know in the comments section below. 

signature for blog post .png
 

3 Simple Ways to Fold Socks

Screen Shot 2018-05-13 at 9.48.45 PM.png

Hello, Spacers…. Okay, I’m trying to find a good name for y’all and its taking my a while to do so!

I was recently doing laundry which for me is washing, dryer, folding and putting them away. Side note: what does laundry mean to you?

Anyways, I was folding and putting aside laundry and came across the socks. Typically, my normal sock folding process is rolling and tucking the elastic part while the feet portion dangles, which for me has worked for many years and still works but because I’m constantly looking for quicker and more simple ways to folding clothes, I wanted to share with you a few simple ways you can fold your socks especially during those busier times. Best part about these different techniques are when organizing your sock drawer, you will no longer have to worry about it being cluttered.

Sock Technique #1 – Roll & Tuck

Take a pair of socks and lay them on a flat surface

Screen Shot 2018-05-04 at 7.41.36 AM.png

Take one of those socks and place it on the other sock. Take the cuff of the sock on top and fold it 1” in.

Screen Shot 2018-05-04 at 7.42.03 AM.png

Next, roll the toe of both socks up until you get to the cuff. 

Screen Shot 2018-05-04 at 7.42.44 AM.png
Screen Shot 2018-05-04 at 7.43.13 AM.png

Once that’s done tuck in the rolled part and then you’re done.

Screen Shot 2018-05-04 at 7.43.27 AM.png

Sock Technique #2 – KonMari

Take a pair of socks and lay them on a flat surface.

Screen Shot 2018-05-04 at 7.45.00 AM.png

Take one of those socks and place it on the other sock and fold both socks into thirds. 

Screen Shot 2018-05-04 at 7.46.53 AM.png

You know you’ve folded it correctly when the socks stand up without assistance

Screen Shot 2018-05-04 at 7.47.53 AM.png

Sock Technique #3 – The Fold Over

Take a pair of socks and lay them on a flat surface.

Screen Shot 2018-05-04 at 7.48.22 AM.png

Lay one sock over the other forming a cross.

Screen Shot 2018-05-04 at 7.49.23 AM.png

Now take both socks toe and cuff and fold them into the center.

Screen Shot 2018-05-04 at 7.49.11 AM.png
Screen Shot 2018-05-04 at 7.51.32 AM.png

Flip it around then you’re done!

Screen Shot 2018-05-04 at 7.51.45 AM.png

I hope this shed some light on different ways to fold socks and possible add some fun to those dreadful laundry days. Well, until next time! 

signature for blog post .png